December 27, 2012

Show it on the Big Screen

 Video tutorial by Nicole Gordon

Learn to project your iPad wirelessly, and it transitions from personal device to collaborative tool in a matter of seconds.

A) It is a more effective visual aid: Demonstrate how to use an app. Play a slide show. Screencast a lesson.

B) It fosters student-centered lessons: Students can project their own iPads onto the Smartboard to show their work, demonstrate a strategy, start a discussion, or ask a text-based question.  Remember to change your airplay password after the students have used it so that they don't project their iPads without permission.

C) It becomes an instant, portable document camera: Just turn on your camera, point the iPad at something, and the students see it on the Smartboard.
     You can then use your iPad camera as a motivator. "Wow! Let's all look at Jane's paragraph and see how neatly she wrote this sentence! Check out Sara's specific adjectives!" 
     You can use use it for live demos. "See how the water changes colors when I mix the two solutions? Notice the antennae moving as the caterpillar approaches..."
     You can use it to annotate: "Take a picture of the starting sentence in your favorite book. Now let's look at the board and highlight the words that make it exciting...This is your homework sheet. Circle these two sections..."


Projecting Options
  • Apple VGA dongle ($29): It works, but movement is restricted by the physical connection to the cable.
  • Reflector  is the program I use. It costs $14.99 and runs on either a PC or a Mac.  In addition to projecting your iPad to the computer, which then can then show up on a projector screen or Smartboard, it can also record what you are showing in the iPad (screen casting), allowing you to have a movie of your sounds and actions, which can then be emailed or posted online.
  • AirServer costs about the same, but it does not have the recording capability.
  • You can also mirror your iPad to a projector using Apple’s Apple TV hardware ($99), but that is the most costly option.


December 25, 2012

History Maps

Zeitag NYC is a simple, user-friendly app that has thousands of location-based, historical photos embedded in the default iPad map. Teaching about immigration or the history of New York City? Zeitag offers students the opportunity to view the city from a whole new (or old) perspective.  You may want to partner this app with Google Earth (select Panoramio Photos layer), have students choose a given area, and compare life today with life in the past. If you have iPads with 3G, enrich your field trips by using Zeitag to add a historical layer to any spot around the city!

For all you Canadians out there, check out Zeitag Toronto.

Please note: The apps below have a similar concept, but were designed for the iPhone.
Historypin
History Here

December 19, 2012

QRafter


QRafter is just another QR code reader (the decoder of those funny looking boxes that appear on billboards and in magazines) but oh, the things you can do with QR codes...

The Basics
·         Visit a QR generator site 
·         Insert the URL, text, or image that you would like the students to see
·         Print (and label) the QR code
·         Have the students open the QR reader on their iPads
·         Play!

Ideas
1.    Independent Learning Station
a.    QR code 1 can be the instructions
b.    QR code 2 can be the website/video/e-book
c.    QR code 3 can be the follow-up instructions or assessment

2.    Self-Check and/or Extension
·         Paste a QR code with the answers onto the bottom of a quiz so students can check their answers when they have completed the assessment
·         Paste a QR code with a challenge questions onto the bottom of an in-class assignment
·         Paste a QR code with a link to a tutorial on the bottom of a HW sheet

3.    Bulletin Boards/Around the Classroom
a.    QR code a slideshow of the process part of the project or of any classroom activities
b.    QR code videos that students created
c.    QR code online links to your blog or for more info
d.    Paste QR codes to pictures, videos, facts or sounds bytes onto a map of a country
e.    Paste QR codes of book reviews in library books

4.    Scavenger Hunts/Games
a.    Create QR codes for people, places, or words that you learned. Print them on stickers and then place one on back of each student. Students who scan have to give clues to the student with the code until he/she can guess what is on his/her back.
b.    Have groups scan codes that lead them to Google Maps of areas they need to research.
c.    Paste QR codes with clues that lead them to spot that has the answer. Near that answer is a QR code with the next clue...
d.    QR Code Tic-Tac-Toe: Place QR codes to questions, maps, stories, etc. on the board. Students scan a spot and answer the question, name the continent, state the main idea, etc. before covering the spot
For a more comprehensive list of ideas, please see this article by Charlie Osborne. 

November 22, 2012

Puppet Pals

Puppet Pals allows you to manipulate up to 8 movable characters or images on up to 5 backgrounds while recording  your voice. The free version includes 7 characters and 3 basic backgrounds. The free version can be used for open-ended story telling activities or expressive language lessons, but you quickly end up purchasing the Director's Pass upgrade, which allows you to use any photos from the photo roll.

When my fourth graders were researching New York State, I wanted them to create infomercials about each region.  First, we viewed travel infomercials and charted their styles, information, catch phrases, etc. They then read books, did internet research (from pre-selected links on the class blog), wrote scripts and found pictures online.

I chose Puppet Pals as the recording tool because it would enable the children to get as close as possible to a green screen effect without using video cameras or green screens - which are not yet an option on the iPad, anyway. They would be able to cut out pictures of themselves (and objects) then move them around on the background as they spoke.

The children loved playing around with the placement of their pictures and the objects. They learned about internet searches, taught each other about the New York regions, and were  proud to send the videos to the governor. However,  they would have liked to add text, and they were frustrated that every time they made a mistake they had to restart from scratch. We also had some sound quality issues, but that was because of our headset adapters. The project took longer than expected, so I ended up putting them together in iMovie instead of the children doing it on their own, and that took quite some time because I had to trim off the distracting "Made Using Puppet Pals" title page that is added to every video. Looking ahead, if Puppet Pals does not add some improvements, I might use Explain Everything for this project. It does not have backstage options or the child-friendly interface of Puppet Pals, but it can technically accomplish the same thing,  works well with Dropbox, and it can be used for a greater variety of projects.

Samples Sections:


November 21, 2012

Searching for a Recording Solution

There are so many opportunities for recording and sharing on the iPad: Dictation, story telling, discussions, assessments, performances, voice to text, etc. However, how many teachers or students actually use the iPad in a silent room? How many teachers or students do anything in a silent room, for that matter?

Hence, my search for the perfect noise-canceling, iPad-friendly microphone headset...which I have yet to find.

For now, I am using a funny little combo of a regular headsetadapter + sound proofing tape + electrical tape (or a USB headset with the Apple camera adapter kit).   This allows up to 5 or 6 children to record in a room at once with minimal background noise. As long as my students keep the microphones at the proper distance from their mouths and the adapters do not fail, (as there were some that did not pick up any voice at all) the system works.  I will not give up on recording even though the projects will not sound perfect. I will just continue my search for a more convenient, reliable system, or better yet - an iPad headset that works.


November 12, 2012

My Maps Editor


This summer, a kind stranger shared this document:  26 Interesting Ways to use Google Earth in the Classroom. I was getting ready to pilot a 1:1 iPad program, and here were 26 cool things that I could do...just not on iPads!

And then I discovered My Maps Editor, the only free app that syncs with Google  Maps, which then syncs to Google Earth. That means if I am teaching about continents, my students can circle, color code, or label the continents, save their work to their Google accounts, then open then open the map in Google Earth to see it all on a movable, interactive globe. When learning about New York, we can trace the outline of the state so it stands out in relation to the rest of the world. We can zoom in and out of our current location to talk about the different sized communities in which we live. We can create a virtual tour of New York State by creating bookmarks on each city and hyperlinking them to pictures or websites. When learning about explorers, we might draw color-coded lines to track each explorer's journey,  calculate the distances, then attach videos or text notes about each one.  The number of possibilities is extensive, but not endless.  It would be nice if one could undo drawings, access old versions more easily, and select a map more smoothly. It would be even nicer if all of the computer options (KML files, etc.) were available on the iPad.  For now, My Maps Editor is all I have.

I'm hoping that by the time my students are ready for more advanced  functions,  My Maps Editor will put out an upgrade, there will be a newer, better iPad app, or they will each have a laptop that is as fast and light as the iPad. My eyes are on the Microsoft Surface Pro...

Please note: Mapedit (1.99) and Map Editor (1.99) are also worth exploring.  MyMap could do more than all of them, but it has ads and more than 30 dollars of in-app purchases.


October 30, 2012

Logo Maker


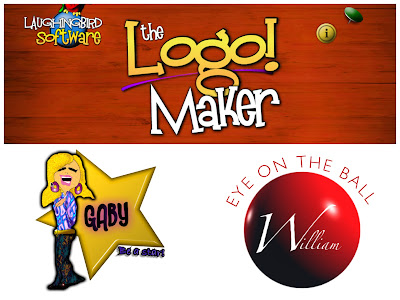
Logo Maker ($2.99) is a neat little app that allows you to design personal logos in just a few quick, easy steps. Users can create a logo from scratch or choose a template and personalize it. The final logo is then exported to the photo album and/or placed on a realistic-looking background. If you wanted to avoid spending the $2.99,  you could probably produce a decent logo by fiddling with Pages, PhotoShop, or any free drawing app, but that would take more skill, creativity, and work.  Logo making is the only thing that Logo Maker can do, which means it does it very well (think laser printer vs. all-in-one fax/copier/scanner/printer).

In my fourth grade tech integration class, we used Logo Maker as part of a lesson on personal branding, which was connected to our election unit.  After a discussion about the various ways presidential candidates create an easily recognized public image, we compared the candidates' logos and analyzed their font, image, and layout. We spoke about other famous brands, such as Nike and Target, whose logos "speak for themselves." Finally, the students were encouraged to think about how they would brand themselves, and we used the Logo Maker iPad app to create personalized logos that could then be placed on stickers, stationary, blogs, and other published work. On a practical note, the students also used (the full name version of) their logos as their iPad wallpaper, which makes the devices that much easier to identify. 


October 25, 2012

Is it All About the Jargon?


Some of use certain tech tools because they sound cool, modern, twenty-first century...not because they make any real difference. But the cloud? You begin to use the cloud, and it turns into this thing you absolutely can not live without. With no Dropbox or Google Drive (my favorite clouds), I would never be able to collaborate without meetings, access my files from anywhere, save space on my hard drive, or turn multiple students' work into one cohesive project. So Dilbert, it's not just about the Jargon...

October 24, 2012

These Are a Few of My Favorite Things...


They are not apps. They come with the iPad. They are on the home screen. They're free! 

Camera:
  • The obvious: Take pictures/videos and import them into emails, blogs, or student files.
  • The not so obvious: Use it as a quick, compact scanner. (When I couldn't find a map that I liked online,  I took a picture of the one in the textbook, emailed it to my computer, and voila...It was on the Smartboard! During Writer's Workshop, when I wanted to showcase student work, I did the same thing.)
Notes:
  • The obvious: Take notes. And shake to undo.  
  • The not so obvious: Use it as a dictionary (highlight  a word and tap "define") or as a reader for students (highlight and tap "speak".)
Calendar:
  • I like the look and feel of the iPad calendar, but prefer to use Google calendars, so I set up my calendar accounts on Google or my school's Outlook system and link them to my iPad. They show up beautifully color-coded, appointments pop-up on demand, and all changes are synced in the cloud.
  • With a student set of iPads, the calendar becomes an essential part of any math lesson... and so does the world clock, for that matter. (Think elapsed time word problems.)
Maps: 
  • The new Apple Maps is not very helpful when I need directions using public transportation, but if I want to plan a virtual tour, teach about directionality, neighborhoods, continents, landmarks, or just about anything geography related, I use Maps, and my students have the world at their fingertips. 
FaceTime:
  • I have never tried this, but we can take our students on a virtual field trip to just about anywhere...as long as that somewhere has a someone (with an iPad or iPhone) who would be willing to host the tour. Think surgeons, professors, park rangers, museum curators, artists, authors, or just friends in interesting places...


October 22, 2012

Photoshop Touch


Photoshop Touch is a scaled down version of the real thing. Honestly, I've never used the real thing, but I love working with the app! Professional graphic designers complain about the lack of options, but for regular folks and students, that's what makes it so user-friendly. In my fourth grade art/tech class, we've been using PT to design historical presidential campaign posters using posterizing and filtering effects. The children had a hard time manipulating the colors and the text effects were limiting even for them. In addition, the fact that it doesn't save previous versions automatically led to some frustrating moments. However, they were proud of creating something professional-looking in just a few sessions, and they are excited to learn about the other tools.